


How to Install and Use Linuxar
Installing Linuxar is fast, beginner-friendly, and doesn’t require complex tools like Git. With just a downloaded archive and a simple command, you can unlock massive performance gains for your low-end Linux laptop.
Step-by-Step Installation Guide
- Download the Package
Go to the official Linuxar GitHub page and scroll to the Releases section. Download the linuxar.tar.gz archive file to your system. - Run the Installer Script
Open your terminal, navigate to the folder where linuxar.tar.gz is located, and run:sudo sh -c 'tar -xzf linuxar.tar.gz; cd linuxar; chmod +x linuxar.sh; ./linuxar.sh'
This will extract the files, set permissions, and launch the optimization script with administrator privileges.🛠️ How to Install .deb File in Linux
Assume your file is:
linuxar_1.0-1.debOption 1: Using dpkg (Manual Method)
sudo dpkg -i linuxar_1.0-1.deb
sudo apt -f install
✅ Option 2: Using apt (Recommended)
sudo apt install ./linuxar_1.0-1.deb
✔️ This automatically handles dependencies.📂 If the File is in Downloads Folder
cd ~/Downloads
sudo apt install ./linuxar_1.0-1.deb
🔍 To Check Installation
dpkg -l | grep linuxar❌ To Uninstall the Package
sudo apt remove linuxar - Follow the On-Screen Prompts
The script is interactive—it lets you choose which tweaks to apply. You can safely skip any feature you don’t want. All settings are reversible, so feel free to experiment. - Reboot to Apply Changes
Once the script finishes, reboot your system to activate all kernel-level optimizations.
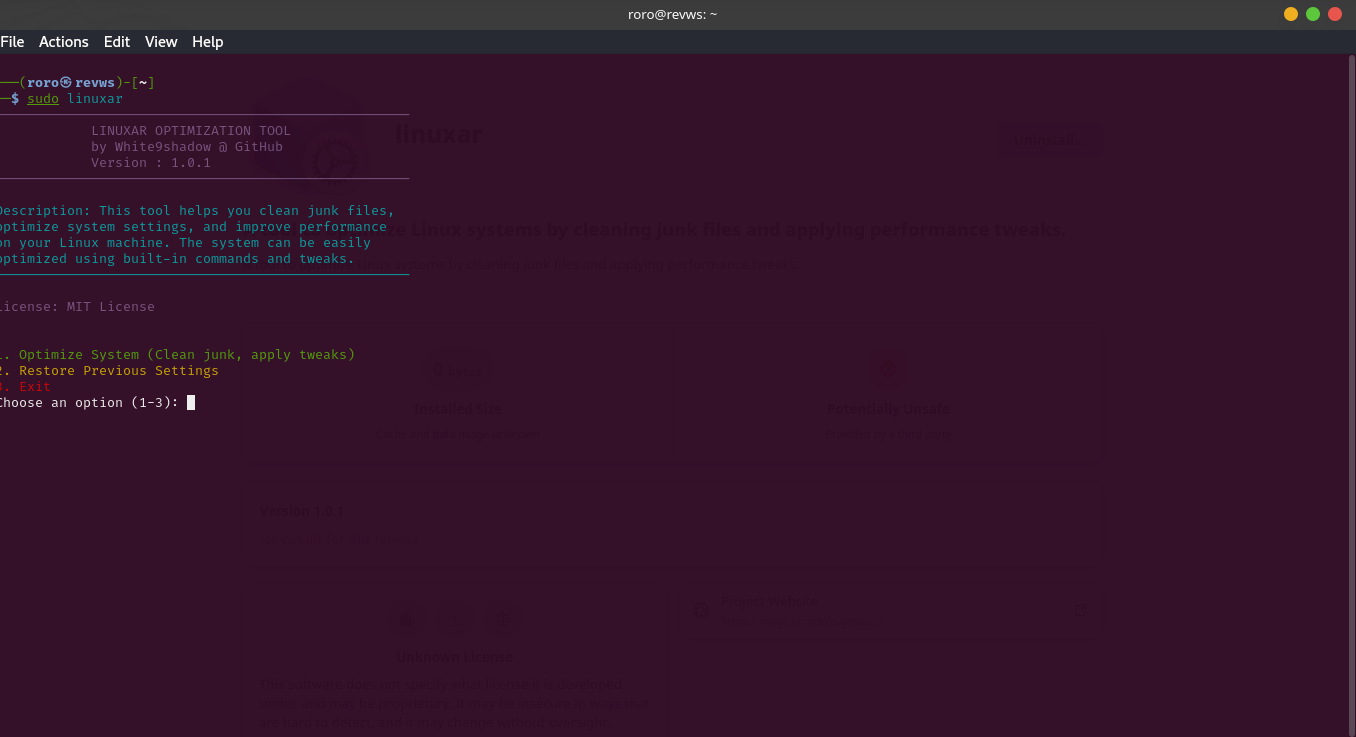
How to Run
just type on linuxar on terminal.
Why Choose Linuxar?
Linuxar gives your old laptop a new lease on life. Expect faster boot times, quicker application launches, smoother multitasking, and better responsiveness. Whether you're on Ubuntu, Debian, Arch, or any other distribution, Linuxar adapts to your setup—no cost, no bloat, just pure performance.
Try it now and experience how a lightweight tweak can make a heavyweight difference.


Ratings & Comments
0 Comments